A Transervatory
(Or, a portable observatory, by Jeremy Rundle)
One of the major problems with astronomical observing is, no matter how dedicated a person is, it's cold at night..
Whilst we amateur astronomers and photographers are happy to spend thousands of pounds on telescopes and associated equipment, often hundreds on just one eyepiece or lens, we are reluctant to spend more than a few pounds on a decent coat. Then when winter comes, which is the best time to view because of early dark nights and clear skies (hopefully), we complain about the cold!
Of course in an ideal world we would buy an observatory; it is what we all aspire to, but they have three major drawbacks. First of all they are expensive, with a decent cheap seven foot one costing thousands of pounds including delivery; second they are limited in size and upgrade-ability; and third they stand out like a sore thumb to a would be thief.
So what alternatives are there? Well there are a number of good erectable tent types, ideal for star parties and holidays, offering sleeping space as well as a place for the scope. However, they are useless for any more than short term, being like tents and affording no security except a nylon wall.
This leaves us with one option: build one.
Many people have come up with complicated ideas as to what an observatory should be, ranging from sheds with roll-on roll-off roofs to large metal or plastic tanks buried feet deep in the garden and covered with a tarpaulin. These are either both expensive and complicated to build or offer no protection from the elements. When in use, you are still standing in the wind.
My observatory on the other hand offers three things, first it is CHEAP, second it is simple, and third it us upgradeable, being of a simple expandable design.
The observatory you are going to see cost under £200 with all parts available from your local large garden center, and it WAS built from collecting the parts to completion in one day.
Designed and built by:-
Jeremy Rundle of Highlands Astronomical Society, Inverness.
The shopping list comprises of:
4 pieces of 6’ x 3’ forest lap fence panels £12 each
4 pieces of 6’ x 2’ forest lap fence panels £10 each (as I am tall I later used 8 pieces of 6’ x 3’ instead)
4 x 4” x 5’ fence posts (*6’ posts if using 8 x 6’ x 3’ fence panels) £5 each
12 x 4” hinges 90p each and 3 £2 hasp and staples
2 pieces of 6’ x 3’ marine 3ply for the roof £10 each
1 cheap plastic tear resistant tarpaulin £10
100 x 2” screws; 100 x 1.5” screws; 100 x 4” screws (sold in packs); 400 x washers £10 the lot.
48’ of 2” x 1” wood for roof surround and attaching roof cover £30
How to do it
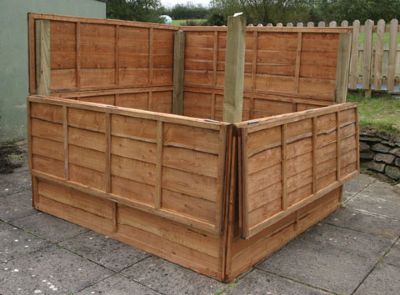
It is simply a case of building what is in effect a box. Screw all of the first four forest lap fence panels to the posts using the longest screws with a washer on each to stop the screws sinking in to the wood.
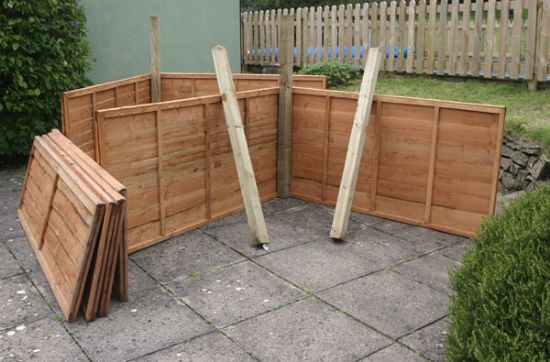
When completed, which takes about an hour, the base is complete and sturdy, allowing the hinges to be fitted. Accuracy is not paramount here, as flexure in the wood allows for any joins not fully aligned.
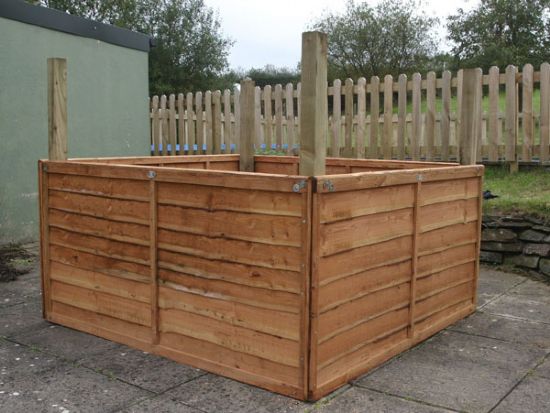

FLEXIBILITY is the most important factor here: you can have any combination of sides or even all of them down, shielding you from light, cold and wind. Yes the posts are an obstruction, but a later solution shows that cutting them and hinging these also means they can be folded down if the roof is removed.
The roof was less easy - it took three hours. It needs to stop the rain so I chose 3-ply marine ply for the roof for lightness when moving. Two pieces were
overlapped to make the roof simply by temporarily joining them with G clamps each side and placing them on top of the "box" observatory and adjusting them until there was a sufficient overlap. See below.
When you have about three inches overlap all round, sufficient to allow you to raise the roof and place the side panels under, you have the right size. Accuracy to the inch is not important.

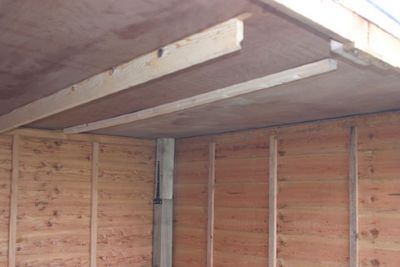
The inside edges of the roof sections are secured by metal L plates to hold them firmly at the corners.
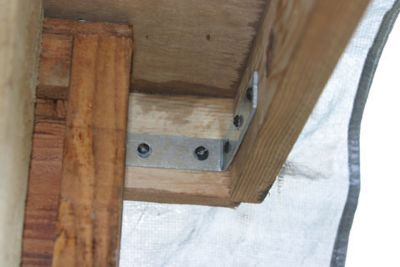
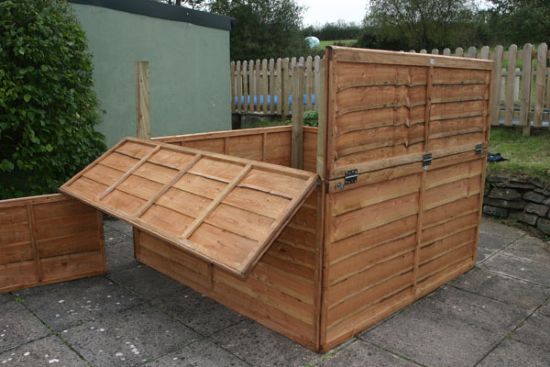
In the photograph below can be seen 6' of the 48' of 2"x1" baton screwed under EACH side of the roof for strength, and so that the forest lap fence when raised will not fall down.
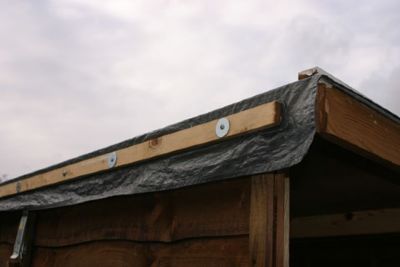
The roof was then covered with the sheet of tarpaulin and four more battens screwed to the above wood from the outside to secure.
Locking is by hasp and staple on just three sides to stop the roof being raised.
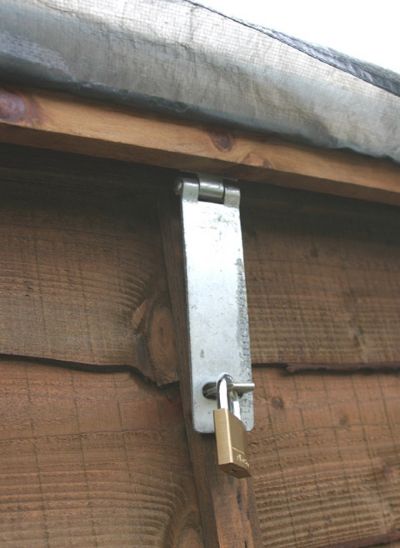
When completed it is a "security friendly" "shed" not looking like an observatory with any high value equipment inside.
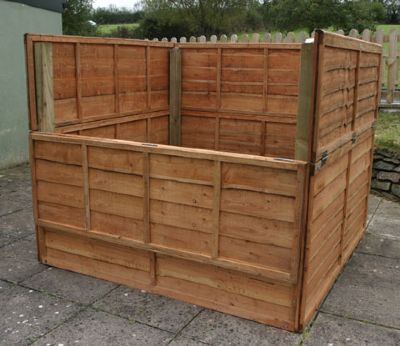
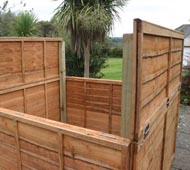
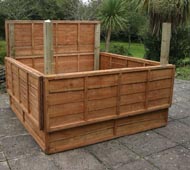
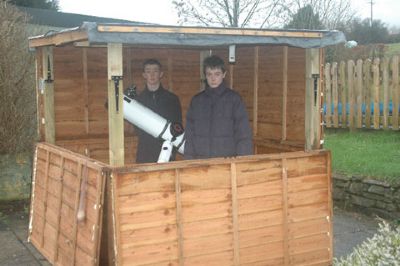
Jeremy RundleOnce completed in under a day, the observatory, seen here with ALL 6' by 3' forest lap panels, is large enough to hold a desk for a laptop computer, heater and GOTO mount. It can easily house a medium or large sized ‘scope such as a 12" reflector or Schmidt Cassegrain type scopes up to 14" and multiple observers.When all top panels are fitted (as I said I have used 3’ x 6' for all panels as I wanted more headroom, this shows a smaller observatory with a mix of sizes), the structure is 80% complete. Yes, you have guessed it entry is simply by climbing in.Next lift one of the top panels in place and secure to the hinges, they can easily be held by one person with a shoulder whilst screwing the top part of the hinge in place, one screw per hinge then going back to complete all screws.