AZ-3 Servicing
Servicing an AZ-3 Mount
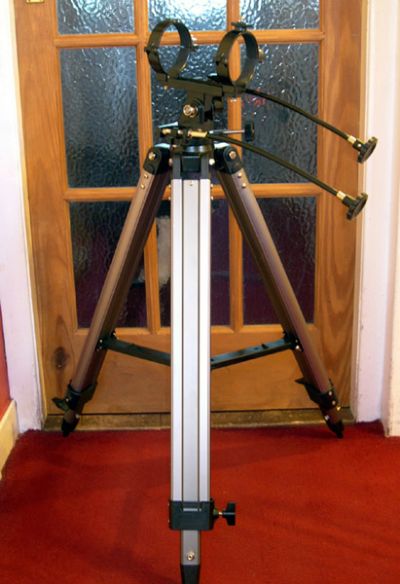 The Synta AZ-3 alt-azimuth mount has been around for a long time. It was originally one of the few alt-az mounts that had slow-motion controls attached, making it a simple matter of turning a knob to track objects instead of nudging the ‘scope along. They have also been included in beginner’s telescope packages alongside everything from 70mm refractors to 127mm Maksutovs- and they manage them all with ease! The AZ-3 is still available from retailers, and at about £90 new it’s still one of the all-time Astro-kit bargains out there. But… some people (myself included) just can’t resist the ever-alluring pages on eBay, and recently I picked one up there second hand with a telescope stuck on top for, well- let’s just say a very good price and leave it at that!
Now, I’ve owned a couple of these mounts before, and so I knew that there were a few tweaks that could be carried out that would improve my AZ-3 from being a pretty good alt-azimuth mount with some foibles, to a perfectly smooth and reliable one. And the best bit is, this whole job only took two hours to do!
The AZ-3 is made by Synta: a Chinese company famous for producing very good, reasonably priced Astro-kit to a budget. That budget sometimes means that little things like quality control and final checks can get left out. The little quirks that any Synta mount (equatorial or alt-azimuth) is likely to suffer from are shaky tripod fixings, poor lubrication, rough motions and, sometimes, poor fitting of components.
When I first had a play with my new AZ-3 I noticed that the altitude motion was very rough, the azimuth motion rough in some places (with a squelching sound that experience has taught me is associated with Synta ‘lubricant’ – more on that later), and lots of flexing in the tripod legs. I had a job to do, so I set out to do it…
Where To Start?
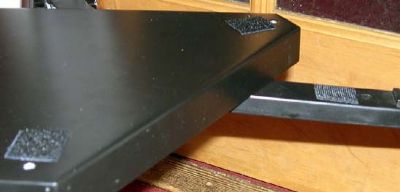
I decided to do the really easy fixes first, and work my way up from the ground – literally. The first thing I dealt with was the flexing tripod legs. The top of the Tripod is attached to the mount by means of three bolts and the legs also support a three-armed bracing structure that holds an accessory tray, situated about two thirds down the un-extended legs. The arms of this brace attach to the inside of the legs by means of a single bolt each. Looking at this assembly, it is obvious that there is play between the legs and the brace, as there are no spacers or washers to take up the slack, so there is plenty of lateral movement if any sideways pressure is applied. This can manifest itself when observing in windy conditions, or when the tripod legs are extended.
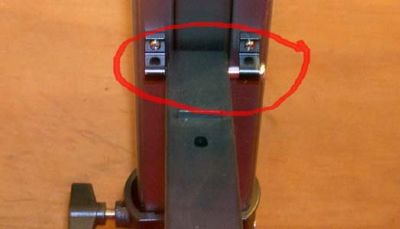
The bolts simply unscrewed, allowing me to place several small washers on either side of the leg attachment and screw the bolts back in place. Result: no sideways motion at the joins.
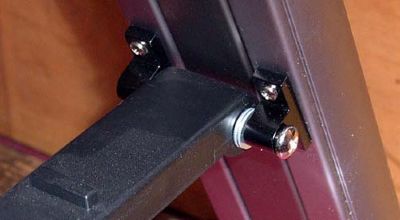
Progressing up the legs I then tackled the problem where the top of the legs attach to the mount head itself by means of a single nut and bolt per leg. Ideally, these bolts should be not too tight when transporting the telescope, so that the legs can be collapsed inwards easily, but should be simple to tighten up firmly when the tripod has to sit firm on the ground. Using a nut and bolt is not best for this, as it means carrying a toolkit whenever you go observing. I replaced the nuts with wing nuts, which are much easier to loosen and tighten. I also replaced the washers that sat against the leg surfaces, as they were very rough and made of plastic. I used smooth aluminium ones instead. Another good result that took a couple of minutes.
The final leg modification I made was to do with the accessory tray. It attaches to the leg brace by means of three wing bolts that screw through the brace and into the underside of the tray. Not quick and not elegant. I stuck a square of ‘hook’ self-adhesive Velcro on each brace leg and a square of the matching ‘eye’ material on the corresponding place on the underside of the tray. Now it takes a second to install and a second to uninstall.
The Mount Head
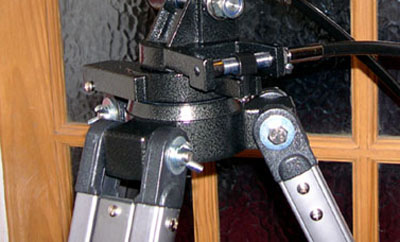
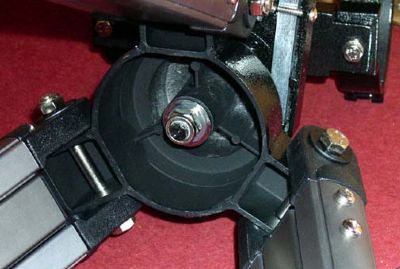
By the ‘mount head’ I mean the bit on top that holds the telescope, rotates, and raises and lowers the tube. The functional bit, if you like. This attaches to the tripod head by means of a single long bolt that runs from the underside of the mount, through a hole in the centre of the tripod mounting, and is fastened with a nut and two washers underneath.
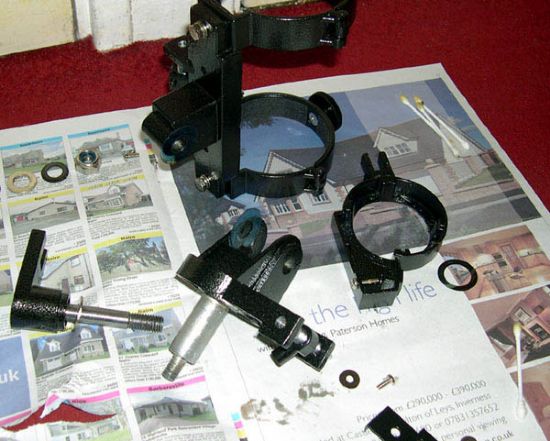
I undid the nut and removed it along with the washers, and carefully lifted the mount off the tripod assembly. At this point you must have space to put lots of little sub-assemblies, nuts, bolts and washers etc, as there are a lot of little bits and pieces that you’ll have to remove, clean, store, and then be able to lay hands on again easily. All of the new washers, nuts and bolts etc that I used are readily available from local hardware stores, and do not cost very much. It’s always worth hanging onto any spares too, as you’re bound to need them one day…
After removing the mount head, I undid the single screw that attaches the azimuth drive pinion to the clutch ring section. The clutch ring section then slipped off away from the mount section. It is actually a lot simpler to do this than to read about it- it makes better sense in 3D!

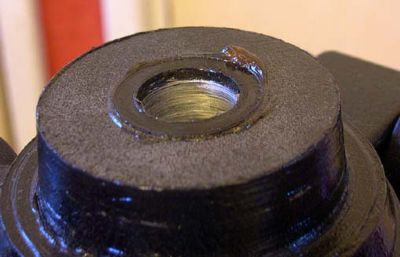
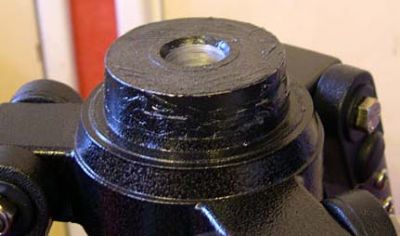
You now notice that all the internal surfaces are coated in what looks like earwax. This is the infamous ‘Syntaglue’ that the manufacturers believe actually ‘lubricates’ their products. It doesn’t. It sticks in globs all over things, is sensitive to temperature changes resulting in things getting even stiffer in cold temperatures, and is just plain awful. If you ever thought to yourself that your Synta mount or focuser etc didn’t need re-lubricating, have a look at the picture below and then consider that this is how it is applied across the whole range!
Luckily I have a tin of 25-year-old Castrol Lithium Grease that sees a lot of (astronomical) use from me, so I dug it out. I also dug out WD40, washing up liquid and an old battery operated toothbrush.
The excess Syntaglue had to be removed first, so I just scraped that off with an old cloth. Then I sprayed WD40 onto the surfaces that still had Syntaglue on, and applied some washing up liquid to the toothbrush and let the Duracell Bunnies do the hard work. After a minute or two you can wipe it all off with a cloth and the surfaces will be clean and dry. Then it was time to apply a nice even, thin, coat of Castrol (other brands of lubricating grease are available) using cotton buds or whatever, making sure that it is thin and evenly spread.
Having done this to the underside of the clutch ring section and all the underside surfaces where the mount sits against the top of the tripod (and the top surface of the tripod assembly itself) I set them all aside and had a look at the top section of the mount.
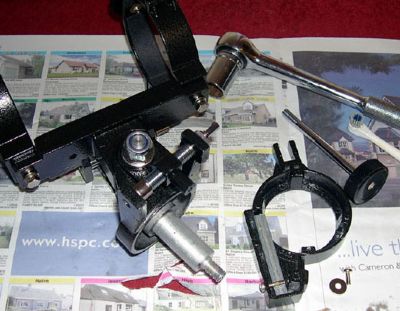
Nuts'n'Bolts
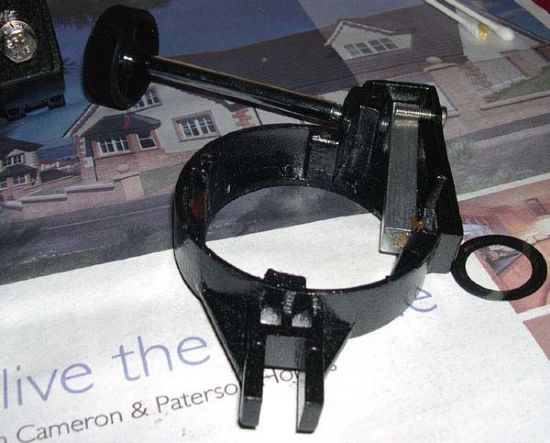
The altitude tension nut essentially holds the whole assembly together. Before attempting to remove that, I undid the screws that hold the altitude pinion to the assembly, which meant that the unit then swung completely loose with nothing holding it in place. The tension nut was then removed and discarded. I threw it away as it should be a self-locking nut, and once removed they never seem to attach to the same tension again. Why? I have no idea, but for the cost of a packet of lock nuts from a hardware store I can afford to live in ignorance. There were then several washers of varying materials, all coated in Syntaglue. I removed them one by one, cleaned them, and put them in a special place where I’d remember them - in sequence! Then, the central bolt simply slid out of the housing, and I’d disassembled the altitude section. Everything was gloopy of course, so everything got cleaned in the same way as before.
The altitude and azimuth pinions were cleaned using the WD40/washing up liquid/toothbrush method and then a spot of Castrol added to each. I then rotated the drive unit using the slow-motion control several times to make sure the new grease was evenly applied along the length of travel. Even at this stage the motions seemed smoother…
I then laid everything out in a logical order and had a cup of tea.
Reassembly Is The Reverse…
I now had everything laid out, cleaned and re-lubricated with proper grease where appropriate, and ready to be put back together. It did look a little bit daunting, but I’d placed everything in logical places, and so it was only a ten-minute job to reassemble the altitude section. All seemed to be going well. I decided to place the clutch ring section on the tripod head first as it would hold it steadily in place while I attached the top section of the mount to it. I did this, and rotated the clutch ring around the tripod mount several times to make sure the new grease was evenly applied. Then the top section of the mount (with the altitude section) simply slotted back in place, with the central bolt passing through the whole upper assembly. The nut underneath the tripod was reattached and tightened, and the altitude section was reattached to the altitude adjustment pinion. Phew! It does sound complicated, but as I said before, it was easier to do than to write about. With everything stuck back together again I noticed that there were no ‘spare’ bits lying around – always a good sign!
I played with it for a while, spinning the mount around and adjusting the altitude up and down to make sure that the lubricant was evenly applied and the motions were smooth. They were - much more so than they were initially, and there were no horrific squelching noises either! The final task was to adjust the tension adjustment nut.
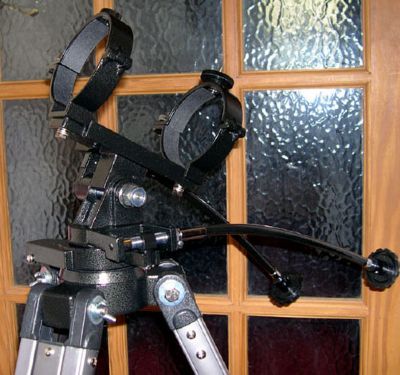
Because the nut is a lock nut, it’s best to adjust it to the correct tension under the conditions that it will be used in. I attached the telescope tube, finder and diagonal so that the adjustment would be made under the normal operational loadings that the mount would experience. Then it was a matter of tightening the nut slightly and manually adjusting the altitude of the ‘scope up and down through the full range of travel to see if it was too loose or too tight. If too loose, the nut was slightly tightened again and the procedure repeated. This was done again and again until the telescope tube was still easy to move in altitude, but would stay in position when my hand was removed.
After that, I used the slow-motion controls to make sure that the telescope would go where I wanted it to with no stickiness or slop. After about fifteen minutes of playing, testing and adjusting, I was happy with the result. The tube would stay pointed at any angle without slipping, and could still be manoeuvred smoothly by using the slow motion controls.
The way the AZ-3 mount is used is interesting. The amount of ‘travel’ the slow motion controls will give is limited by the length of the altitude and azimuth pinions, hence the need for coarse ‘manual’ control as well. The idea is that you position the tube roughly by hand then lock the azimuth clutch and use the slow-motion controls to track the target object across the sky. Every now and then, when the end of the travel allowed by the pinions has been reached, the user must move the tube manually again and ‘reset’ the pinions to allow further tracking. It doesn’t take much effort to learn and is not hard to do at all. The slow-motion tracking feature is very useful when using medium or high power magnifications too.
This little project took very little time and effort, and gave a great improvement to the product. This AZ-3 will now be much more usable, with smoother motions and steadier support. Not bad for two hours work…
Antony McEwan