Sky-Watcher ED100
By Antony McEwan
Or, ‘A Budget APO that doesn’t bring the blues.’
 4 Inch Apo. There’s something about that term that makes people sit up and take notice. Apo refers to the term ‘apochromatic’, which is a definition of how well a lens system will correct for chromatic aberration, and yield colour free images. Oh dear. Only two sentences written and I suspect some of you are switching off already… Right, I’ll go back to basics for a minute.
A traditional ‘achromatic’ refractor uses lenses at its front end to ‘refract’ the incoming light to a focal point at the back end of the telescope, where an eyepiece is used to view the image. Typically, refractors use a pair of lenses cemented together, and this combination of two slightly different lenses reduces a nasty side effect of refractors- chromatic aberration. Different wavelengths of light (which we perceive as different colours) refract by different amounts, so if a white light source shines into the front (objective) lenses in a telescope, the image seen at the eyepiece will not have all the wavelengths come to the same focal point. This results in different focal points for the different colours, and so when viewing a bright object like Vega or a planet, the colour definition will not be true and there will be a ring of ‘false colour’ around the target caused by the blue wavelengths that don’t quite come to focus at the same point as the others. The amount of false colour displayed varies according to the focal ratio and aperture of the refractor, so that high focal ratio refractors generally show less than low focal ratio ones, and smaller apertures are also generally more forgiving. It is more noticeable at high magnifications too, so will show up more when looking for detail on the planets, for example.
Enter the Apochromatic refractor. The Apo, as it’s known, uses specially produced glass types (typically fluorite or some other exotic material) in one of its lenses, which so changes the way that light is refracted through the lens that it corrects for the difference in wavelengths to a much higher degree than an achromatic telescope, bringing them all to focus much closer together, and so significantly reducing (and sometimes completely removing) any trace of the false colour produced in an achromat. The price of this quality is, well…the price! The glass used is expensive, and the manufacturing process time consuming, so that naturally puts a premium price on Apo ‘scopes. But it’s not only the glass in an Apo that is of high quality. With a superb set of lenses in the tube, manufacturers such as TeleVue, Stellarvue, Takahashi and others typically make sure that all the other components in the telescope are also top notch, and so the retail price continues its climb, until at the end of the process a 4” Apo can typically cost about £2000 or higher. Compare that with £250 for a standard achromatic refractor.
So, all 4” Apo’s are expensive then? Well, not anymore! Synta is a well-known Chinese telescope manufacturer that produces not only complete telescopes, but also components and optics for other telescope manufacturers. Their products are typically good quality and robust, but lacking a certain finesse found in more expensive brands. Their own brand label is ‘Skywatcher’, and they have been on the market for many years now, with offerings of reflectors, achromatic refractors and Maksutovs. Well, they have now branched into apochromatic refractors; first with an 80mm model, then more recently with a 100mm model. Could I resist? Not for long…
Opening the Box
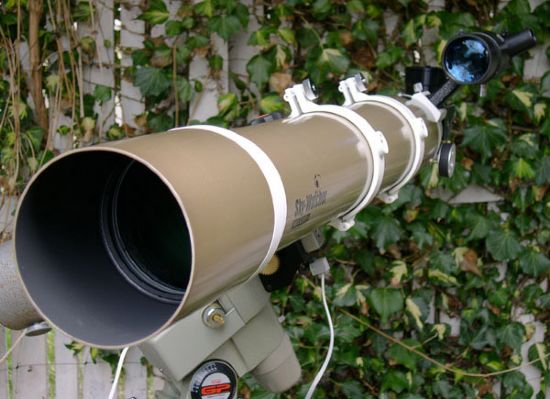
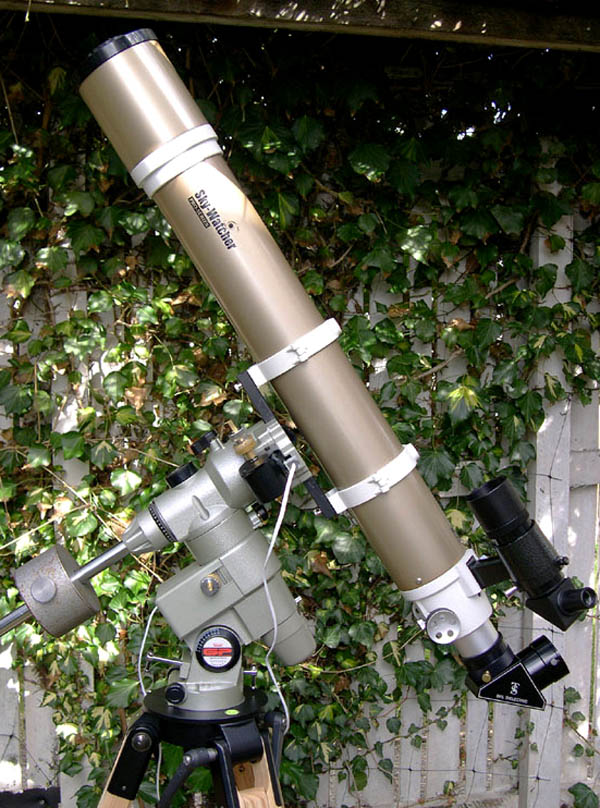
Having read much about the Skywatcher ED-100 on the internet, and having heard about the joys their owners were experiencing, I decided to keep an eye out for one at a good price. About that time a new model was introduced- the ‘ED-100 Pro’. The Pro model had the same basic design as the original model: 100mm aperture, focal length 900mm so a focal ratio of 9. Aluminium tube with a 2” Crayford focuser, and usually supplied with a pair of tube rings to attach to most mounts. The 2” focuser allows use of wide angle 2” eyepieces, allowing one to take in large swathes of sky at low magnification- great for viewing large extended objects such as the Andromeda Galaxy or the Veil Nebula. The only visual difference was that the Pro was gold coloured with white trim, while the older original model was a nice sparkly Skywatcher-Blue with black trim. The Pro was also about £100 more expensive, despite having exactly the same optics! Naturally I started looking for a nice older one, but found them to be very rare indeed- people didn’t seem to sell them on after using them! Gold tubes were taking over, but eventually I found a very good deal at Pulsar Optical, where I obtained a showroom demo Pro for the price of the older original model. I decided I could put up with the 'bling' colour scheme and paid the money.
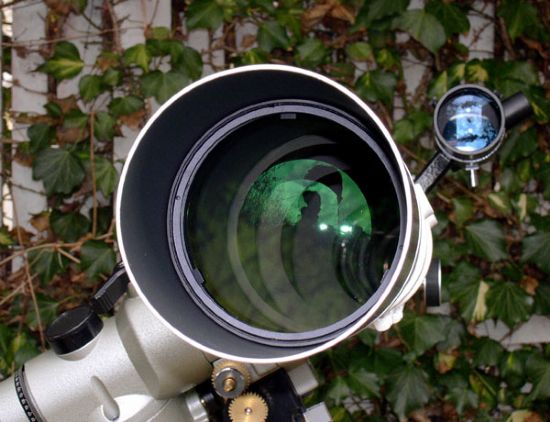
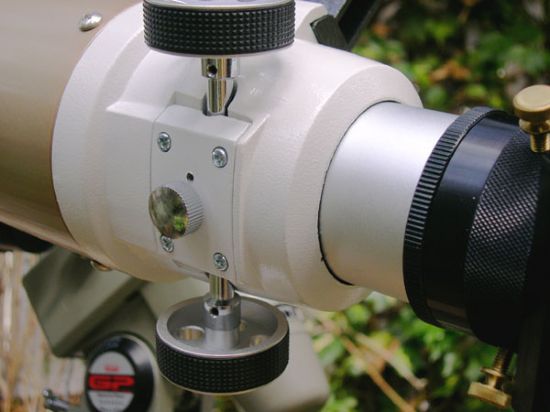
The telescope arrived a few days later, in perfect condition. It looked brand new, never mind demo model! The objective was clean and shiny, with superbly applied deep green coatings, and the tube was unmarked. There was a small amount of surface dust present on the lens, but this really was no problem and you simply can’t prevent this from accumulating so I was not worried about it. I was interested in the Crayford focuser, having never used one before. It is different from a Rack & Pinion focuser, in that it uses a roller to apply pressure to the underside of the drawtube, and this roller moves the drawtube in and out. A rack & pinion obviously depends on gears and teeth to do the same job, and if the two don’t mesh exactly the result can be a slight choppiness to the movement. Not so with a Crayford. I found the movement to be very smooth, much more so than the rack and pinion focusers on my two reflectors. My TeleVue 85 has a rack and pinion too, but it is exceptionally smooth- about the same as the ED-100 Crayford. There is a tension adjustment knob for increasing the friction against the drawtube, and this is recommended if you are using a heavy diagonal or eyepiece and want to prevent the drawtube slipping when the telescope is pointing high in the sky. Even with the telescope mounted indoors on my alt-azimuth Giro II mount, with the tube pointing straight up I noticed that this would be a problem, and realised that I’d be using that friction adjustment knob quite often.
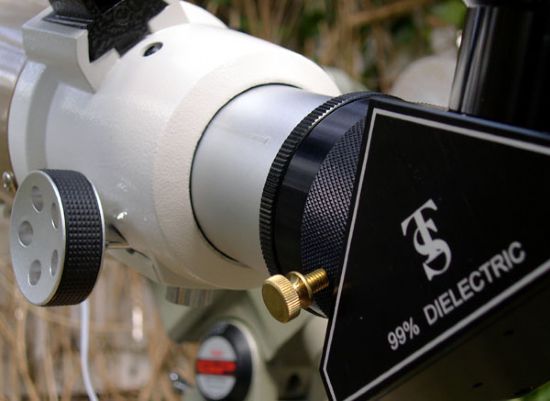
The focuser also has a built in shoe for attaching a standard Synta type finder bracket. I happened to already have a few of these, so decided to dedicate my right-angled 9x50 to this ‘scope. I also ordered a high quality 99% reflective dielectric coated 2” diagonal, to get the best possible views through the eyepiece from my new baby.
Expectations
What did I want my new telescope to achieve? What did I want it to do that my 6” and 8” reflectors and 85mm Apo couldn’t do? Why had I bought it?
What I love about my TeleVue85 is the fact that it can go from being a wide-angle vista-viewer one minute to a zoomed-in detail-deliverer the next. It excels in both fields, and is portable, lightweight and easy to transport. I wanted the ED-100 to do the same job, but with a little more light-grasp to show a tad more detail. The reflectors show much more detail than small refractors, but at the expense of bigger tubes and increased bulk. Ultimately though, there was an element of curiosity too- could a ‘budget Apo’ deliver serious performance at an affordable price?
First (and other) Lights
 First light was on a dark autumn night, at a completely dark site. I mounted the ED100 on my driven Vixen GP mount, and even when I was polar aligning the mount I was impressed by the view of Polaris and its neighbouring stars, with Polaris’s 9th magnitude companion star showing itself easily even at 42x magnification. The GP mount handled the tube assembly with ease. The ED-100 is really quite lightweight at 7lb, a smidgen less even than my TeleVue 85! A diagonal, finder-scope and eyepiece add one or two pounds to that, and as all of those weights are added to the back end of the tube, the balance point moves towards the rear of the tube and the rings that attach it to the mount can then be placed quite close to the eyepiece end. This is a subtle, but important, factor. It means that when slewing the telescope all over the sky, the eyepiece will not actually move as far as if the telescope were mounted lower on the mount. Balancing any telescope tube assembly on a mount is something that quite often gets neglected, and by having the tube balanced you are less likely to suffer sudden swings and dangerous dips when loosening an axis locking knob, for example, which could result in a nasty (and expensive) meeting of optic and tripod.
I toured some easy double stars, and just revelled in the views of Albireo and Mizar. The ‘Double Double’ in Lyra showed both pairs very easily split at 85x, and the views were overall colour-free when the ‘scope was in perfect focus. I noticed it was important to have the focus ‘spot-on’ though, as a touch too much or too little would result in some false colour showing around bright stars, though even then not much. But then, you always want the ‘scope to be properly focused anyway. (As an aside, did you know there is an easier way of achieving perfect focus and a harder way? The harder way is by getting close to the sweet spot, then racking the focuser in and out and in and out, until you eventually hit the spot. The easier way is to approach the sweet spot by moving the focuser ‘inwards’ only, and if you overshoot simply back it out to a point well away from focus, and then use very small movements inwards again, until you reach focus. The reason for this has to do with your eye’s ‘accommodation’ - to put it simply, the eye is more relaxed and natural if you use the in-travel method, and has to strain more if you are racking the focuser in and out.)
For me the highlight of that night was seeing the Veil Nebula in Cygnus. This is an elusive object to catch in a 4” telescope, and yet the view was really quite bright for the limited aperture. I was using a 30mm 2” eyepiece for 30x and a field of view of just over 2 degrees, and slowly panning back and forth across the separate strands of nebulosity that make up the nebula was a real joy. More importantly, it showed that the ‘scope had high light transmission, and would excel in showing faint M-objects as well as planetary detail.
The next time I used the ‘scope, I was baffled by something. I set it up this time in my back garden, which is unfortunately enveloped in the glow of two sodium street lights. Try as I might, I could not get rid of what I thought was a strange yellow tint to all the stars I looked at, no matter what spectral type they were. Even white stars showed an orangey hue. Of course it should have been obvious, but with a new ‘scope in my hands I was perhaps a bit panicky, and wondered if something was wrong with the optics…
Third light was at Culloden in November 2005, on one of the Mars viewing sessions organised to let members of the public see Mars in all its glory as it approached opposition. That particular night we were discouraged from setting up the Society’s 10” reflector by persistent cloud, but we set up our portable ‘scopes in the car park to use in the fleeting clear periods. Lining up the ED-100 on Vega this night, I could see it in its true colour- bright blue-white, with no orange or yellow tint at all. The same went for other white stars. The detail shown on Mars was similarly excellent, with no hint of discolouration. I went home happy that night, taking with me the conclusion that the orange glow I was detecting from my back garden was some interaction of the sodium lighting with my ED-100’s optics.
Further Viewings
The ‘scope has seen a lot of use since then, including star party viewing sessions at Culloden, dark site sessions, and quick peeks from my garden. Viewing highlights that spring to mind include seeing the 5th ‘E’ star in the trapezium on a night of excellent seeing, sharp detail and subtle colours on Saturn, including the shadow of the planet on the rings, and tonal variation at different latitudes on the globe. It also shows open clusters beautifully, and is able to give wide fields of view when using 2” eyepieces, which show objects such as the Beehive cluster, Double cluster, Pleiades, Hyades and open clusters of Auriga as sprinklings of sharp pinpoint stars against an ebony background. Truly the way open clusters are meant to be viewed!
On one occasion I tried for some galaxies with the ED-100, and was very pleased indeed with its performance in showing the pair of galaxies M81 and M82 in Ursa Major. I was using a Moonfish 30mm 80 degree eyepiece that night, and while it didn’t show anywhere near the level of detail my 8” Dobsonian shows, the view was very pleasant and it was obvious what the target was. Of course, swinging that combination over to M42, the Great Orion Nebula, left me gazing in wonder at the panoramic view. Visible were the swirls of nebulosity; the sharp stars of the trapezium in the middle of the star-forming cloud of gas and dust, and the strands and wisps that spread out from them, shaping themselves into wing-like structures that nearly filled the field of view. Adding a 2” Ultra High Contrast filter increased the contrast of the nebulous areas against the background sky, but did dim the stars quite significantly.
I star-tested the ‘scope quite early on, by lining up on medium bright star, and racking the focus in and out while using high magnification (240x). The diffraction rings at this magnification were completely circular in focus, and when defocused the ring around the star stayed perfectly circular, showing that the optical alignment of lens and focuser was perfect. My very limited understanding of what the star-test shows suggests that the telescope has a good pair of lenses, as the rings seemed evenly illuminated around their circumferences, and on a night of very good seeing there seemed to be no distortions within the solid circle of light when the image was defocused to the extent where the rings filled a large part of the field of view. Star-testing isn’t my forte, but this result, in combination with the fact that everything I’ve looked at through the ED-100 looks exactly as I would expect it to, seems to suggest to me that the optics are good, or possibly very good.
On the subject of false colour, I have to say that the views are not as colour free as those shown by my reflectors, but they are very close to it. The views are not spoiled at all by blue fringes around bright stars and planets, but it is important to have the image perfectly focused to get the best out of the optics. Lunar views are very nice indeed, with stark black crater shadows, and only the tiniest hint of blue-green shown at the full moon’s limb, similar really to what my TeleVue 85 shows under similar circumstances. In short, I had to really look for it. I have read other reviews where owners have stated that compared with much more expensive Apo’s, the ED-100 provides 90% of the performance at 25% of the price. I agree with this, and so I think that it is definitely worth the asking price, and does add something to my collection of telescopes. Three somethings, actually: versatility, portability and performance.
Mechanicals
The ED-100 performed very well, and gave a suitably high smile-per-view ratio, but there were some things about it which I became aware of that would need to be ‘fixed up’. First is that the ‘Visual Back’ or accessory ring that attaches the diagonal to the drawtube uses two very small, light screws to hold the diagonal in place. This does not make for the most secure fastening, especially when a good diagonal and eyepiece combination can weigh up to a pound and a half! Also, these screws can scratch the barrel of the diagonal (this is only a cosmetic issue) but I was not too happy about the risk of one of the screws working loose in the cold and the diagonal and eyepiece rotating, or even dropping out. The solution is to remove the supplied adapter and attach a third party one that uses a compression ring to hold the diagonal securely in place. I ordered one from Mercury Systems in the USA, and this is a much more secure option. They are also quite inexpensive at about $37 US each (about £20 at the time). The difference was immediately noticeable, and I was much more confident when using heavy eyepieces thereafter.
The Crayford focuser was very nice to use, but I found that when pointing the telescope upwards there was a tendency for the drawtube to slip under some conditions, making it harder to rack the drawtube ‘in’ towards the objective. The recommended solution is to tighten the friction knob, which results in more pressure on the drawtube, meaning less likelihood of slippage. This worked, to a degree, but I found that I had to tighten the knob quite a bit to eliminate the slip completely, and that by doing so the tension on the focuser was a little more than I liked. It’s a tricky thing to describe, and a subtle effect, but I found that it was a little niggle in the back of my mind. The motion of the focuser is actually very good indeed, and it is easy to find the focus sweet spot most of the time. Having said that, there was one occasion when the drawtube actually slipped out quite quickly, and would have caught my face if my reactions hadn’t been quick enough. I then resolved to tighten the friction knob up and leave it tight forever more, and just put up with the slightly increased tension. It’s really not a big thing, just a minor point to be aware of.
Those are the only slightly negative points I found when using the ‘scope on many occasions, and I consider that to be quite a good record, especially for a telescope in this price bracket and with so much to prove.
Minutia
I should mention some other conclusions drawn from my months of use of this ‘Budget Apo’. First off, it’s been great fun to use. It’s very quick and easy to set up, and takes only a few minutes to cool down to ambient temperature, even on nights of -5’C or so. Also, it is easily mounted, and was just as at home on my Giro II alt-azimuth mount as on the Vixen GP. It is the first telescope that I’ve taken photographs through. I captured some shots of the Moon, and the close conjunction of Mars by the Moon using my Nikon Coolpix digital camera. This was something completely new for me, but the camera did most of the work! The images were processed using Photoshop Elements, and can be seen on the Spacegazer Image Gallery. I have just been examining the unprocessed images to see the extent of false colour at the limb of the Moon, and it is barely evident at all. I still have these original images if anybody wants to check them for themselves.
I also use only good quality eyepieces with my telescopes. The eyepieces used during the viewing periods included TeleVue Plossls, Pentax XL’s and standard Orthoscopics. For ultra wide-field my Moonfish 30mm 80 degree eyepiece was used, and for the afocal projection for the Moon images a Meade S4000 32mm Plossl. All the eyepieces reached focus easily with no need of any additional tele-extenders or adapters of any kind.
Conclusions
I like this telescope. It does show a ‘little bit more’ than the TeleVue85, and has colour correction that is almost as good as the pricier brand leader. The 2” focuser is very good once I grew accustomed to its foibles, and the wide field views offered by it are excellent. It zooms in well for high power viewing, and maintains a bright image up to reasonably high power (~200x for the gas giants is quite usable, and more for lunar features).
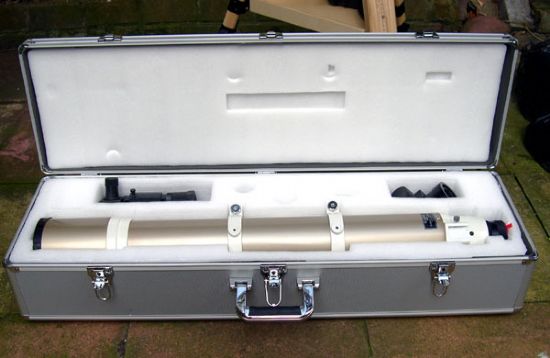
And then there’s the value for money. The telescope itself cost me just under £500, and I have to add to that £100 for a high quality diagonal and £70 for the optional aluminium foam-lined case. Tube rings and a dovetail plate were included in the price. The visual back adapter cost me another £20, bringing my total outlay to £690. To buy any other brand of 4” Apo would cost me at least twice that, and probably more. The telescope has delivered images that met my expectations with regard to optical quality and colour correction. I have to describe this as a bargain. Maybe I was lucky to get one in such fine optical shape, or maybe all Skywatcher ED-100 Pro tubes are as good as mine. Or here’s a thought- maybe there are some out there that are even better…!
So I am one totally happy ED-100 Pro owner. So much so that I have taken steps to remedy the only weak link in my particular example- the slightly loose focuser travel – by ordering a replacement third party alternative model focuser. I didn’t do this lightly, and I realise that many people will not be bothered to the same degree by the ‘problem’. I just feel that the optics, and the telescope in general, are so good that they easily justify the additional £100 expense of a high quality up-market replacement focuser, especially as I intend to keep (and use) it for quite a while! Details of fitting and using the replacement focuser will follow in an update to this review, but for now you can safely say I think this ‘scope is great!
Antony McEwan