ED100 Focuser Swap
If you refer back to my review of the Skywatcher ED-100 Pro 4” apochromatic refractor, you’ll see that I was generally very well pleased with the telescope, and intended to keep and use it. The colour correction and quality of the views had impressed me, especially considering the asking price. The only small concern I had was the focuser, or more precisely, the lack of any real tension on the drawtube in the focuser. This resulted in the drawtube slipping out at inopportune moments, and meant that it was difficult to aim the telescope near the zenith when using heavy eyepieces, as I could not depend on the eyepiece staying in the same place!
I was not alone with this concern, and there are now several third party focusers available that will fit the ED-100 tube with no modifications needed and no special skills required, other than the ability to hold a screwdriver without dropping it. I had a look around on the Internet and decided to go for the ‘2” Crayford Focuser for Synta Refractors’ made by Baader Planetarium. I spotted it on the web page of Teleskop-Service in Germany, and it appeared to be a well-made and professional looking unit. The price was good too, working out at about 166 Euros (about £108 at the time) including postage and packaging. After some discussion with the company about its suitability, I sent the order.
Arrival
Several days later a box arrived. Inside that box was another box. Inside that box was the new Baader 2” Crayford focuser. With tentative fingers I parted the bubble wrap and plastic wrapping and looked at the nice silky black assembly in front of me.
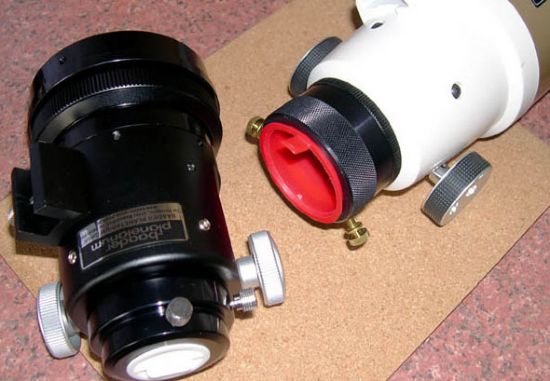
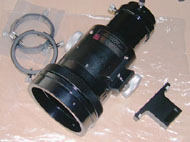 It certainly looked to be in a completely different league from the standard Synta Crayford. Where the Synta was clunky and covered in crinkle finish white (yes, white…) paint, this was super smooth satin finish black. The focuser wheels were actually a little smaller in diameter than the Synta’s, but they turned very smoothly and were quite sturdy to the touch. The Synta focuser used two setscrews to hold diagonals or eyepieces in place in the drawtube, while the Baader focuser uses a compression ring for a much more secure grip. It also came complete with a 1.25” adapter, also with compression ring fitting. So I sat there for a while playing with this new focuser, admiring the sleek blackness of it, and turning the focus wheels just for the fun of it.
But then I realised I couldn’t do this forever – I had to actually fit the thing to my ED-100!
Removal and Installation
The standard focuser on the ED-100 was held in place by three crosshead screws, spaced 120 degrees apart around the tube assembly. Baader had designed their focuser to use the very same holes for attaching their replacement unit, so in essence the whole replacement process should consist of undoing three screws, sliding the old focuser out, sliding the new focuser in, and tightening the three screws again.
Now, if you’re looking for an exciting read, with graphic descriptions of trials and tribulations overcome in heroic manner, I’m afraid this isn’t the place! The whole process was exactly as described above! Sometimes things really are as simple as they’re supposed to be…
I mounted the telescope on my Giro mount so that it wouldn’t roll around or drop off the table while I was messing about with it. The three screws came out with no problems at all. I placed them carefully to the side, as they would be needed later. The Synta focuser was quite a tight fit in the tube, but came out after a sharp tug.
I then took the Baader focuser and checked the fit inside the tube. It was not as tight a fit as the Synta focuser, and left perhaps a millimetre to spare around the circumference of the part of the focuser that went inside the telescope tube. I didn’t worry about that, but simply lined it up so the three screw holes were in the correct place, and then inserted and tightened the screws. Looking back now, I should really have wrapped a piece of electrical tape around the focuser to provide a more snug fit, but I was caught up in the heat of the moment and didn’t think. With the screws tightened there was no sign of any buckling or creasing of the tube, so I was quite happy with the installation.
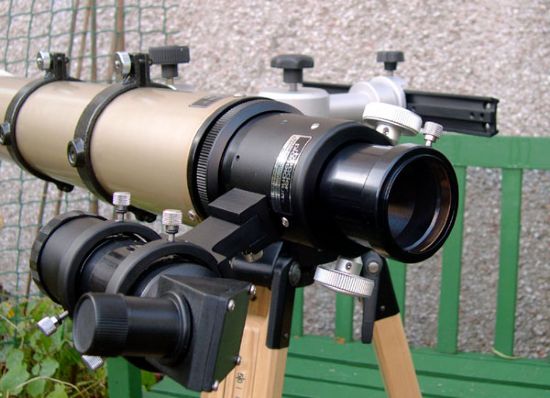
Instantly the telescope looked a lot better! A satin finish black high quality focuser certainly looks the part, and a lot more so than the clunky white-painted Synta model it replaced. The new focuser also came with a pair of rings to house an 8x50 size finder-scope, and there is a slot on the focuser body that accepts the small bar that these rings attach to. The screws that tighten against the finder-scope are nylon-tipped so that they do not mark the surface of the finder- another nice touch.
So the new focuser was in place, but that was not the end of the worry. When replacing a focuser you have to get it in such a position that it is aligned correctly with the objective lenses at the front of the telescope. If the focuser is misaligned the images shown at the eyepiece will suffer from distortions and it will not be possible to get a sharp satisfactory image. The best way to check that the focuser is aligned well is to take it out under the stars and do some observing, preferably with a high power star-test as well.
I waited for a clear night.
Testing, Testing…
First Light came a few nights later. I mounted the scope on my Vixen GP driven mount and headed for a dark sky site. A crescent Moon and the summer constellations were the main targets.
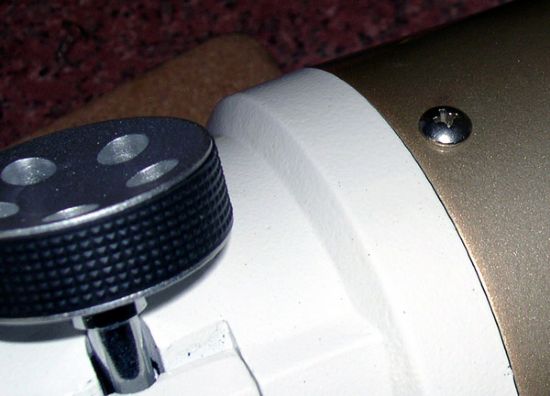
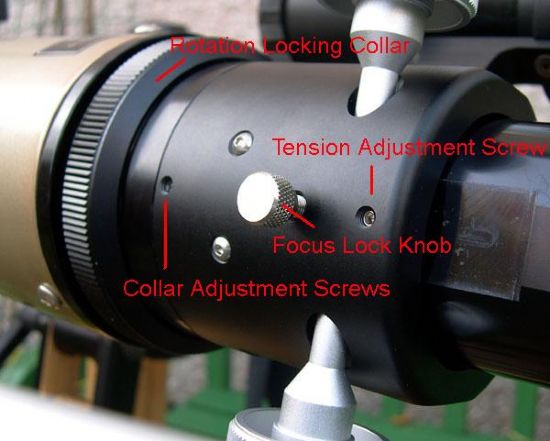
The Baader focuser has 360-degree rotation built in. This means that you can loosen the locking collar, rotate the main body of the focuser (complete with diagonal, eyepiece and finder-scope) to a comfortable position, and then tighten the collar again. This has the advantage of making it easy to place the eyepiece comfortably when using the ‘scope on an equatorial mount, and for photographers it allows them to easily ‘frame’ their target within the confines of their camera’s CCD chip or film exposure area. I loosened the collar, rotated the focuser to a good position, and tightened the collar again. The focuser body would not quite stay locked in place though, even with the collar done up very tight. The weight of the finder-scope, offset to one side, kept pulling it round in that direction. This was a bit of a worry.
I found out later that there are several very small screws around the focuser body, just below the locking collar. These screws affect the locking collar mechanism, so that tightening them slightly removes the ‘play’ that was evident when I tried it out. A mere quarter turn of these tiny screws solved the problem completely. I found this out by trial and error, though it was later confirmed as being the correct thing to do in an email from the manufacturers!
Back to the test night, and the focuser worked very smoothly. The drawtube action was light and smooth, the wheels rotated easily with no rough spots in their travel, and overall I was very impressed! I took the ‘scope up to high power on the Moon and the image remained sharp and contrasty. Similar results were shown when viewing double stars Mizar, Albireo and Epsilon Lyrae, and so I carried out a high power star test. I used a 7mm orthoscopic eyepiece and 2X Celestron Ultima Barlow lense to provide 257x magnification, and centered the view on Polaris. The star appeared bright with multiple diffraction rings around it, and the rings were definitely ‘rings’- they were round, not elliptical or oval, so I knew then that the focuser was in alignment with the optics! Phew! That was a moment of great relief, as it meant I would not have to undo the focuser placement screws and then jiggle the focuser about trying to find the point of best alignment.
Happy with initial results, I called it a night. Saturday night.
Further Use
I have gone on to use the ‘scope and its new focuser many times since then and have found it to be a very great improvement over the old Synta focuser in all areas. I had no problems getting any of my eyepiece to focus in the ‘scope, be they of complicated or simple design. Although, I did find that when using a heavy Moonfish 30mm 2” eyepiece the old problem of ‘slippage when pointing at zenith’ began to rear its head again! It was not as bad as the Synta had been, but I felt it shouldn’t be there at all. When focusing the eyepiece ‘inwards’ and the tube was pointing high up, I had to give it a helping hand from behind to overcome the gravity holding it down. Slightly disappointed, I turned to the Internet again…
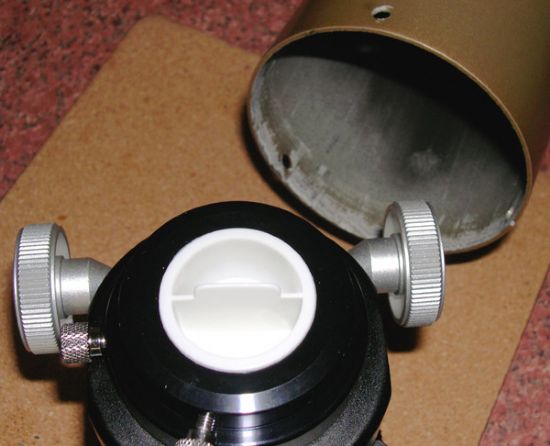
I found that someone on an American forum had asked about the same problem. A diagram was produced, and it showed yet another tiny little screw, an Allan Screw this time, just below the tension adjuster. This screw was to be used to adjust the base level of tension on the drawtube, and then the large thumb-knob could be used as a total locking mechanism. It seemed the base level of tension on mine was a little low for the weight of eyepiece I was using, so I fished out my small Allan keys and gave it a turn. Voila! Now when pointing upwards I can use all my heavy eyepieces and the drawtube moves easily in either direction with no slippage. The locking mechanism works fine too, and actually stops the focuser wheels from moving the drawtube at all- they can spin freely and the drawtube is completely locked in place, unaffected by the wheels until the lock is unscrewed (half a turn is all it takes).
With this newfound knowledge I was able to set up the focuser exactly as I wanted it, and since then it has performed like a charm. The whole job was quite easy to do, though I did have to refer to the Internet for advice a couple of times, and this might have been avoided if a proper instruction sheet had been included. The only technical information I could find on it was in the form of a downloadable PDF from the Baader website, which did not include instructions on how to make the various adjustments. As always, dealing with Telescope Service in Germany was a pleasure and the goods came swiftly and very well packed.
To me, the Baader focuser is a vastly different unit from the old Synta one (which I sold on to help fund the purchase) and I now feel the ED-100 is a much more ‘complete’ telescope. There may still be one or two modifications I can find to keep me busy though, if I look hard enough. I keep thinking about blackening the tube interior more and flocking the dew shield. Stay tuned!
Antony McEwan